|
|
|
| |
|
|
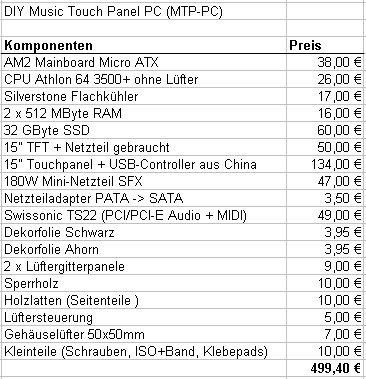
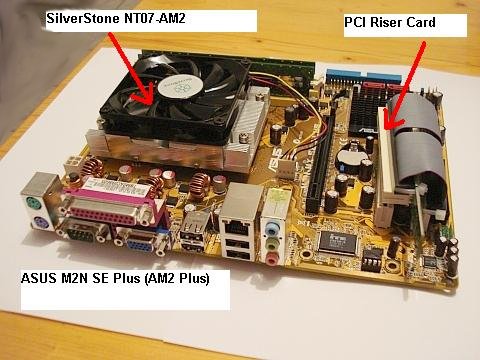
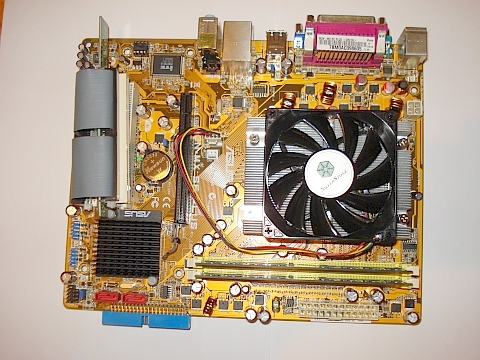
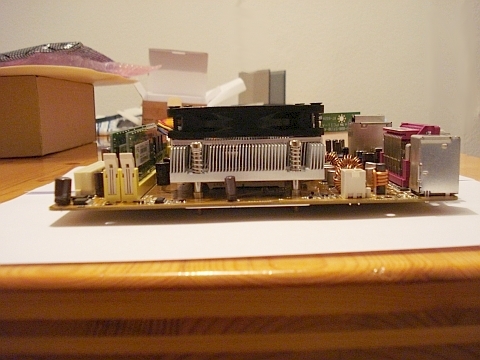
Das Mainboard...
|
| |
|
|
| |
|
|
| |
|
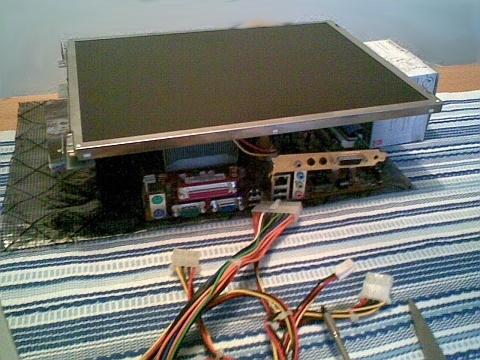
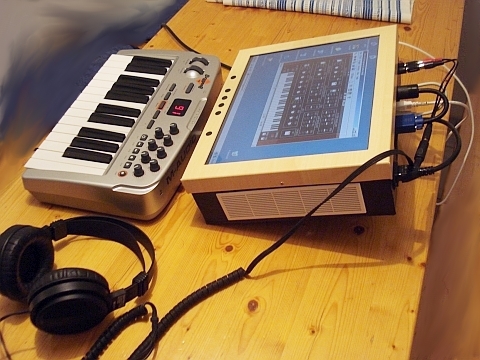
Der Versuchsaufbau...
|
| |
|
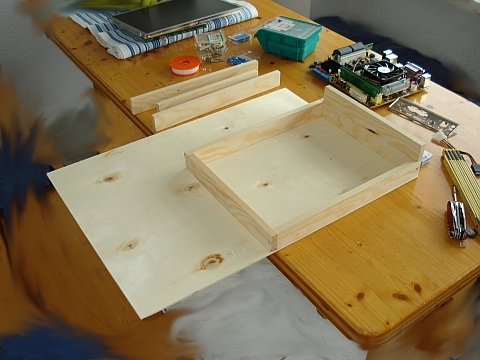
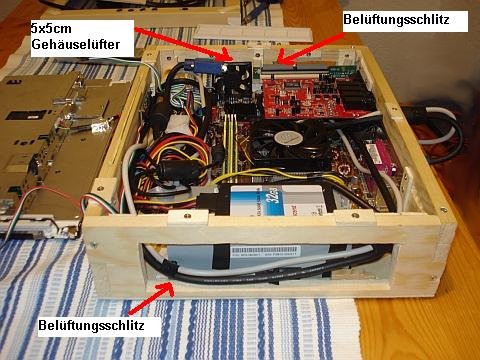
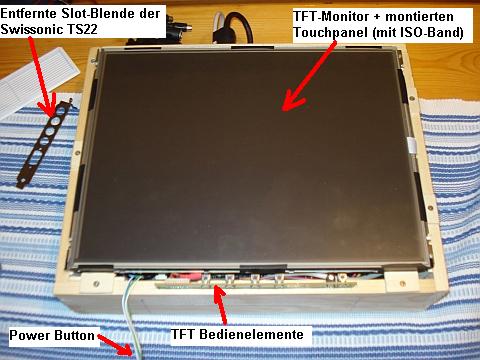
Zuschneiden und montieren der Seitenteile und anreißen des Gehäusebodens.
|
| |
|
Dann wird der Gehäuse- boden mit einer Tischkreis- säge oder Stichsäge aus- geschnitten.
|
| |
|
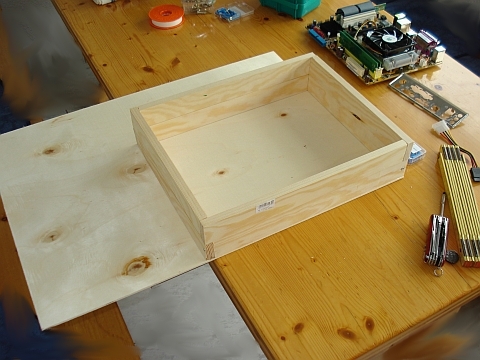
Anschrauben des Gehäuse- bodens an die unteren Seit- enteile.
|
| |

|
Hinteres Seitenteil in zwei Teile sägen. Die Lücke muss dem inneren Rand- Maß der Mainboard-Blende entsprechen.
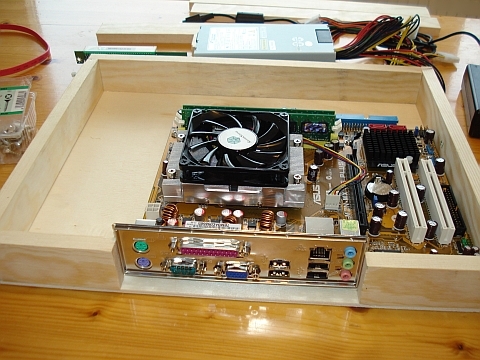
Mainboard in das Gehäuse passend an die rechte hintere Ecke legen und die Bohrungen für die Mainboard-Abstands- halter anreißen und vor- bohren.
Mainboard ent- nehmen und die Abstands- halter in die Bohrungen ein- drehen.
|
| |
|
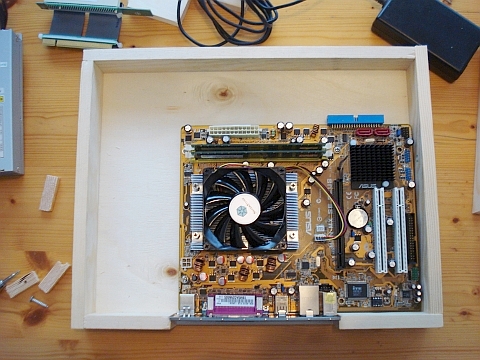
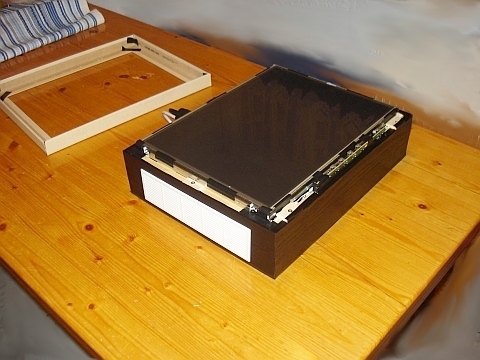
Befestigtes Mainboard mit Mainboard-Blende.
|
| |
|
|
| |
|
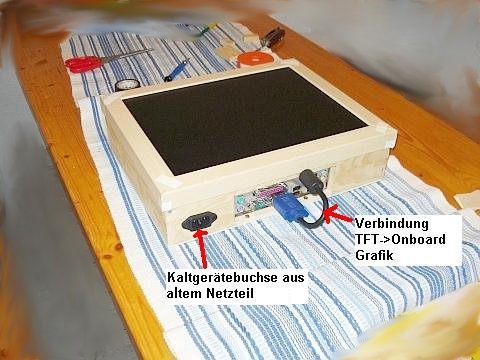
Durchbruch für Kaltgerätebuchse angerissen und in das untere hintere rechte Seitenteil gesägt.
Oberes hinteres Seitenteil für den Ausschnitt der Mainboard-Blende angerissen und ausgesägt. Die
|
|
Restlichen Seitenteile (2. Etage) werden montiert.
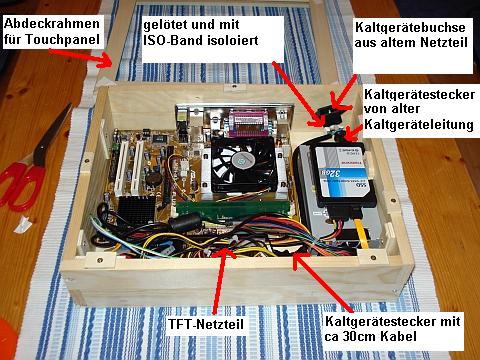
Kaltgeräte-Y-Adapter (2 Ste- cker auf eine Buchse ge- lötet) und
SFX-Netzteil und TFT-Netzteil an Y-Adapter angeschlossen und probe- weise eingebaut.
SSD-Fest- platte einfach mit ISO-Band an das Netzteil geklebt. (kein Problem das Ding kann nicht vibrieren)
Kabel- wege schon mal ergründet.
Der Abdeckrahmen wird aus einer MDF-Winkelleiste her- gestellt. (Kappsäge 45Grad ähnlich Bilderrahmen)
|
| |
|
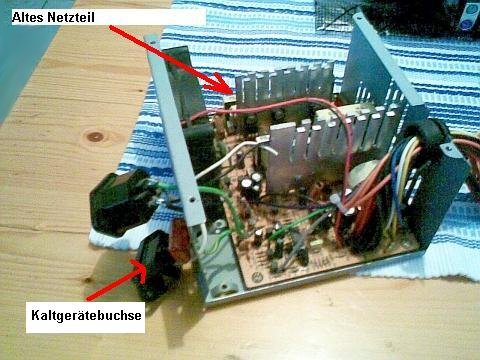
Die Quelle der Kaltgeräte- buchse...
|
| |

|
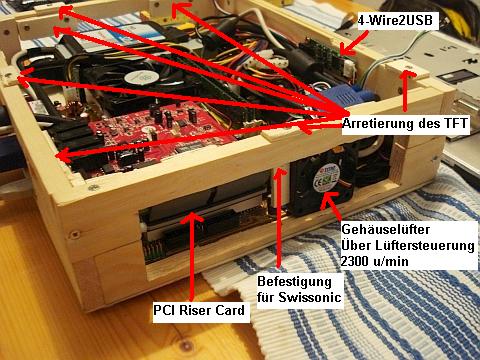
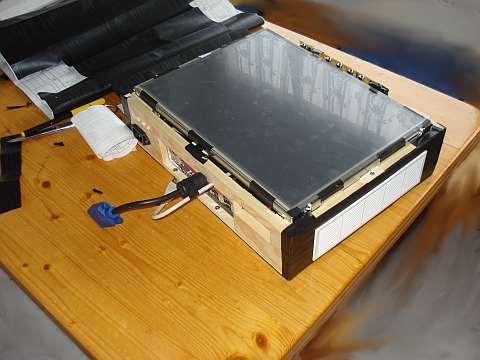
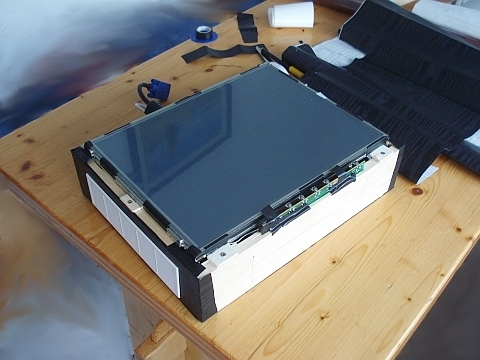
Probeeinbau des TFT- Pan- els. Anschrauben der Arre- tierungsholzplättchen (Sperr- holzreste) an die Oberseiten der Seitenteile.
|
| |
|
An der Unterseite des ober- en hinteren Seitenteils, ober- halb des Mainbord-Blenden- Ausschnitts, zwei Löcher für das VGA und USB-Kabel bohren.
TFT-Panel mit VGA- Kabel montieren und an den Onboard-VGA-Ausgang des Mainboard anschließen.
Ab- deckrahmen aufsetzten und probieren ob alles richtig sitzt.
|
| |
|
USB-Kontroller für das vier- draht Touchpanel am vorder- en oberen Seitenteil mont- ieren. (Anschrauben)
|
| |
|
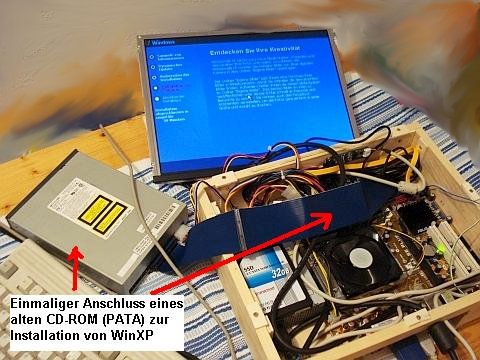
Inbetriebnahme des MTP- PC's und Installation des Betriebssystems.
|
| |
|
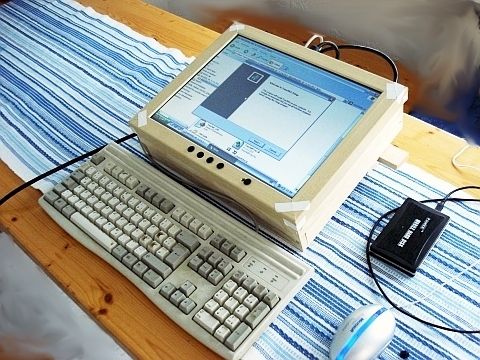
Montage des Touchpanels auf das TFT-Panel und an- schließen des USB-Kont- roller an einen rückseitigen USB-Anschluss des Main- boards.
Das Touchpanel ha- be ich einfach an den Ränd- ern mit ISO-Band am TFT- Panel befestigt. (Klappt pri- ma)
Anschließend: Installat- ion aller notwendigen Trei- ber und Software.
|
| |
|
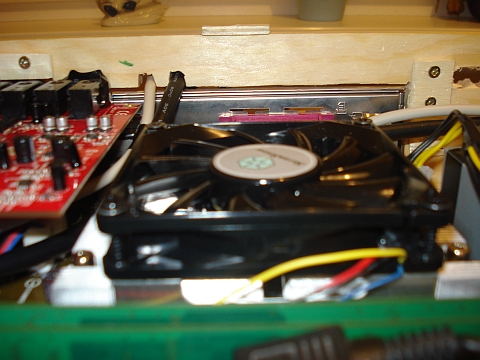
Mit Hilfe des Gehäuselüfters werden die Innentemperaturen dauerhaft auf 40 Grad gehalten. Der Ge-
|
|
räuschpegel steigt dank der zusätzlichen Lüfterregelung nicht nennenswert an.
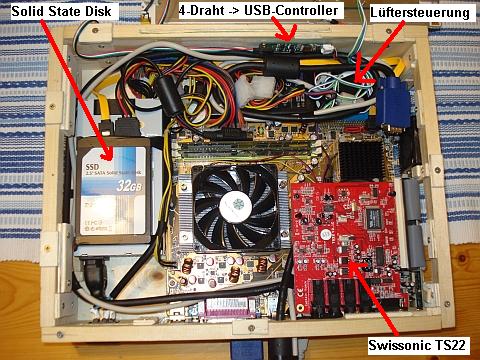
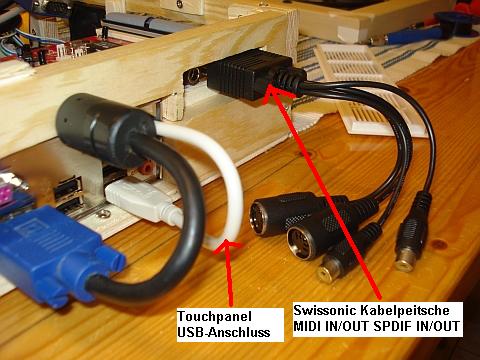
Als letztes wird das Audio- interface, eine Swissonic TS22, installiert.
In das hin- tere obere Seitenteil musste auf der linken Seite ein Ausschnitt für den Ansch- luss der Kabelpeitsche sowie der beiden Klinken- ausgänge (L/R) gesägt wer- den.
Dieser wurde dann, nach dem Einau der Swis- sonic, durch dünne Sperr- holzplättchen abgedichtet. Diese wurden später sch- warz bemalt.
|
| |
|
|
| |
|
|
| |
|
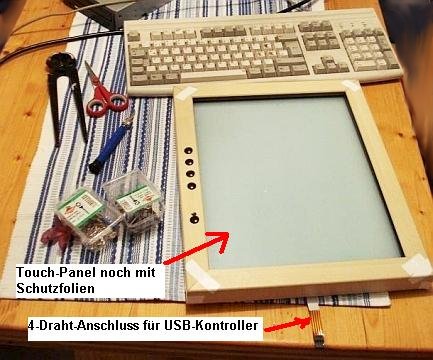
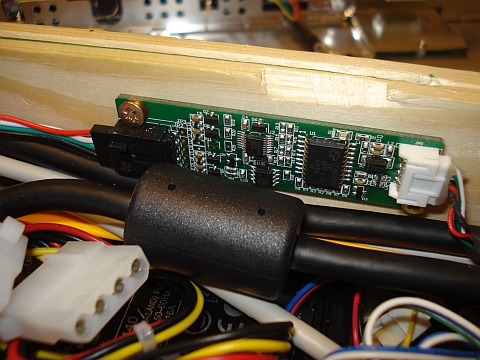
Der 4-Draht zu USB-Kont- roller (im Lieferumfang des Touchpanels)
|
| |
|
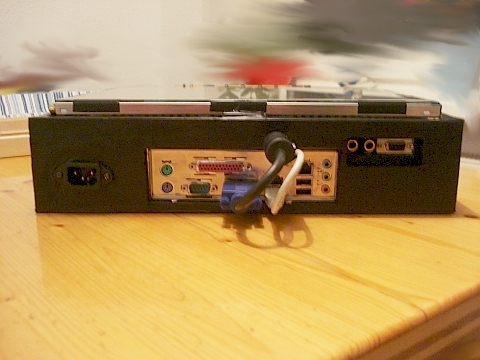
Rückseite (hintere Seiten- teile) des Gehäuses. Zu erkennen ist der (schlecht gelungene) Ausschnitt für die Swissonic Soundkarte.
Auch ein Lüftergitterpanel ist zu sehen.
|
| |

|
nochmal von der Vorder- seite aus...
|
| |
|
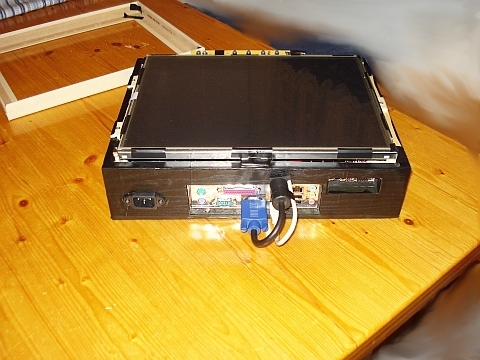
Hinten: die durchaus sch- lecht gelungenen Löcher (von Bohrungen kann man wohl nicht mehr reden) für VGA- und USB-Kabel.
Ab- stand vom CPU-Lüfter zur Rückseite des TFT-Panel nach Einbau ca. 15mm.
|
| |
|
|
| |
|
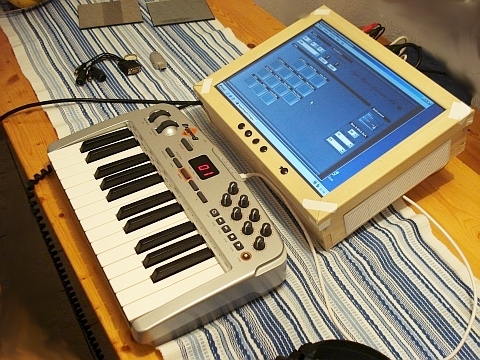
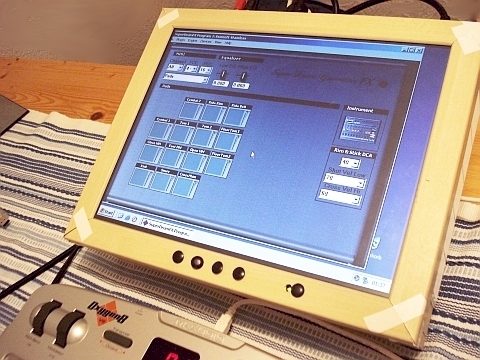
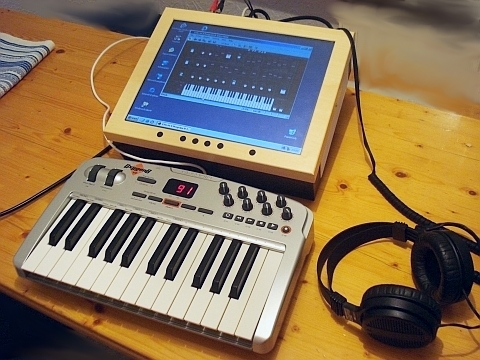
Erste Tests mit der noch unveröffentlichten SuperDrumFX v1.4 .
|
| |
|
|
| |
|
Jetzt wird der MTP-PC schön gemacht.
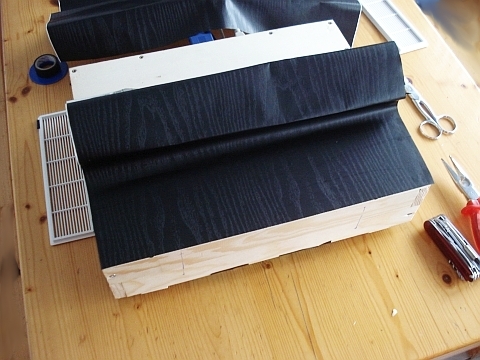
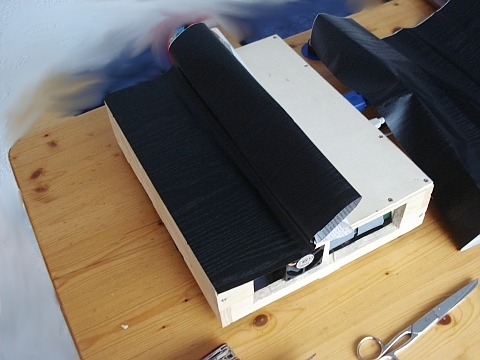
Für den Bo- den und die Seitenteile ver- wende ich schwarze Dekor- folie mit künstlicher Maser- ung.
|
| |
|
|
| |
|
jetzt die Seitenteile...
|
| |
|
|
| |
|
Vorderseite...
|
| |
|
Rückseite...
Die Innenkanten der Aus- schnitte habe ich zuvor schwarz gestrichen.
|
| |
|
|
| |
|
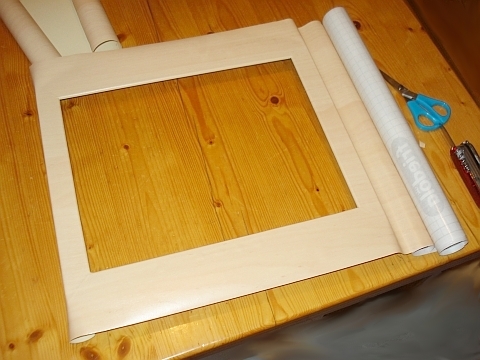
Jetzt wird der Abdeck- rahmen verschönert. Ich habe hierfür künstlich ge- maserte Ahorn-Dekorfolie verwendet.
|
| |
|
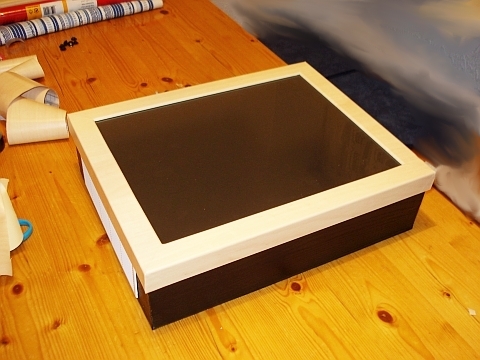
Schon mal schauen wie es so aussieht...
|
| |
|
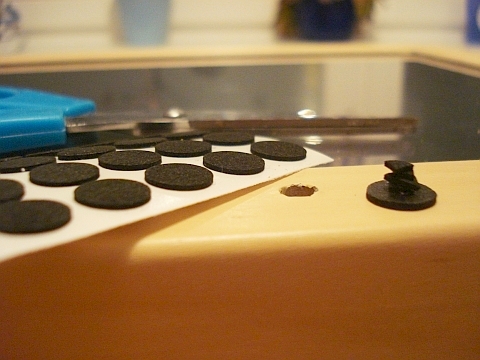
Für die Bedienelemente des TFT-Panels sowie für den Power-Button des PC's, verwende ich selbst hergestellte Druckknöpfe.
Die Lösung ist absolut einfach und zuverlässig. Ich bin erst kurz vor der
|
|
Fertigstellung auf diese Idee gekommen.
Zuvor wurden Löcher in den Abdeckrahm- en, oberhalb der Druck- knöpfe, gebohrt.
Kleine sch- warze Moosgummi-Klebe- pads auf die ich klein ge- schnittene selbstklebende Filzstückchen klebe haben dieses Problem gelöst.
Die Moosgummipads werden m. den Filzstückchen nach unt- en, in das Loch passend, mittig über die Bohrungen geklebt.
Man erhält nun ein- en klaren Druckpunkt. Durch die Elastizität des Moos- gummis und der Filzstück- chen reicht der schwache
|
|
Gegendruck des Druckknopfes aus um den Druckknopf
nach Betätigung wieder in die Aus- gangslage zu versetzten.
|
| |
|
|
|
| |
|
|
| |

